7 Top DIY Cuticle Removers To Try At Home
This post may contain affiliate links, which means I may receive a small commission, at no cost to you, if you make a purchase.

Cuticles are the colorless layer of skin that forms along the bottom edges of your fingers known as the nail bed.
Their purpose is to protect the tissue that creates new cells to create nails. They also protect your nails as they grow from the base.
This skin area is extremely delicate so it can easily dry out or get infected when not properly cared for.
Since cuticles help protect your nail matrix, it’s crucial to give your cuticles the proper care that they need if you want to keep your nail area healthy and look polished.
One of the essential nail care steps is using a cuticle remover.
But did you know that you can also make a DIY cuticle remover that you can use to maintain your nails?
Yes, that’s true!
Most people think nail color is the most important part of getting a perfect manicure. We hate to break it to you, but it is actually the cuticles.
If you want to know more about cuticles and tips on how to make them healthy, check out What Are Cuticles? + Cuticle Care 101.
But for this article, we will mainly discuss and teach you how to concoct a DIY cuticle remover using natural ingredients in easy steps.
Table of Contents
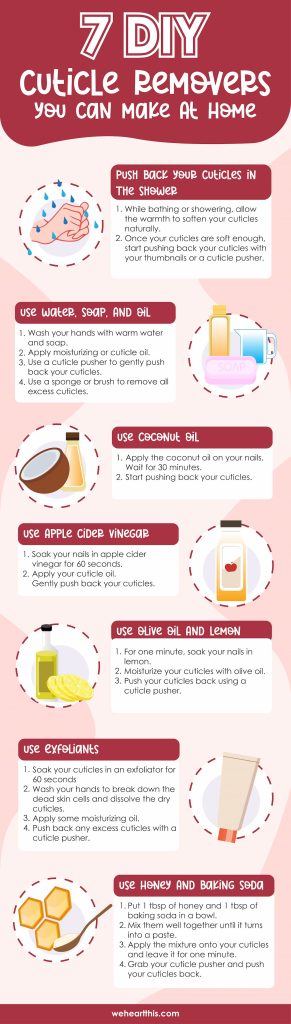
7 DIY Cuticle Removers You Can Make at Home
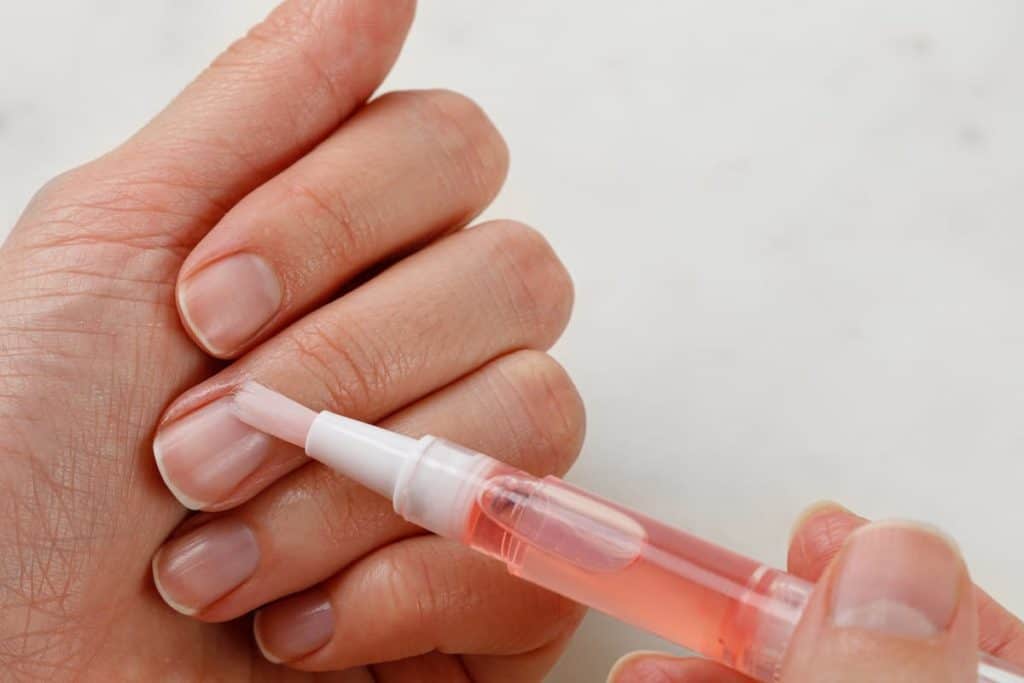
Cuticle removers are products intended to remove that thin layer of dead skin on the cuticles by dissolving it.
Most nail technicians use a chemical version of cuticle removers. Some of the highly used cuticle removers they use are the Blue Cross Cuticle Remover and the Sally Hansen Instant Cuticle Remover.
Chemical cuticle removers can be a painless alternative to trimming and cutting cuticles. But when they are overused or not used correctly, they could lead to certain risks or the need to remove the cuticles.
That’s when the natural DIY cuticle remover comes in handy. If you don’t want to risk your nail health, you can try these easy DIY cuticle removers
Push Back Your Cuticles in the Shower
Many people think cutting stubborn cuticles is the best way to remove them.
However, nail experts discourage trimming the cuticles as it can only create jagged edges, more hangnails, and even infection.
Instead, you can push back your cuticles gently. You can do so while bathing or showering, allowing the warmth to soften your cuticles naturally.
Once your cuticles are soft enough, start pushing back your cuticles with your thumbnails or a cuticle pusher.
It’s one of the best methods to maintain a healthy cuticle. Plus, it requires no ingredients, just a cuticle pusher and water.
Use Water, Soap, and Oil
One of the most accessible and easiest DIY cuticle remover methods is to use water, soap, and oil. This tip is perfect if you don’t have time to buy a cuticle remover.
Here’s how to do it:
- Use warm water and soap to wash your nails, cuticles, and hands.
- Instead of drying your hands, apply some moisturizing oil or a cuticle oil like the Cuccio Naturale Revitalizing Cuticle Oil to your nails.
- After applying the oil, get a cuticle pusher and gently push back the cuticle.
- Once your cuticles are pushed back nicely, remove all the excess, dry cuticles using an exfoliating sponge or a nail brush.
And you’re done! This can be your nail’s lifesaver if you don’t have a cuticle remover.
Use Coconut Oil
Instead of spending money on moisturizing oils or cuticle oils, you can also use coconut oil as an alternative for those products.
Apply the coconut oil on your nails and wait for 30 minutes before you start pushing back your cuticles.
This natural oil will penetrate your nail bed and act as a cuticle softener.
If you think your nails or cuticles are dry, coconut oil can help restore the moisture it needs.
Not only that, coconut oils even help promote nail growth!

Use Apple Cider Vinegar
Did you know that apple cider vinegar can do wonders on your nails? In fact, this product might be the solution to weakened cuticles.
If you’re constantly exposed to bacteria in your hands and suffer from weak nails, you may want to do a DIY cuticle remover using apple cider vinegar.
To do that, soak your nails in apple cider vinegar for 60 seconds, apply your cuticle oil, and slightly push back your cuticles.
This vinegar won’t only make your nails soft, but it can also help disinfect them without weakening the keratin on your nails.
Use Olive Oil and Lemon
If you want an alternative product for apple cider vinegar, lemon is here to the rescue!
Lemon contains citric acids that help weaken and dissolve the cuticles.
Like apple cider vinegar, lemon is an excellent disinfectant as it can kill unwanted bacteria on your nails.
For one minute, soak your nails in lemon and then pair it off with olive oil to moisturize your cuticles as you push them back using a cuticle pusher.
Use Exfoliants
Exfoliants are cosmetic products that contain special chemicals designed to remove dead skin cells from the skin’s surface.
These products are often gentle and safe and can be found in facial wash, acne treatment, and other skin treatments.
Exfoliators contain active ingredients like hydroxy acids or salicylic acid, which can weaken the bond that binds dead skin cells together. As a result, the dead skin cells on your nails and cuticles can be removed easily.
If you have any exfoliants with lactic acid, glycolic acid, citric acid, or salicylic acid, soak your cuticles in them for 60 seconds and then wash your hands well to break down the dead skin cells and dissolve the dry cuticles.
After that, don’t forget to apply some moisturizing oil and get your cuticle pusher to remove and push back any excess cuticles you have.
Once you’re done exfoliating your cuticles and nails, buff away the damaged nail keratin, and you will see an improved nail appearance in no time.
Use Honey and Baking Soda
Not only can honey keep your cuticles and nails supple and nourished, honey can also help fight fungal and bacterial growth.
To create the perfect DIY cuticle remover gel and mask, combine the hydrating properties of honey with the natural exfoliant properties of baking soda.
Here’s what you need to do:
- Put one tbsp of honey and one tbsp of baking soda in a bowl.
- Mix them well together until it turns into a paste.
- Apply the mixture onto your cuticles and leave it for one good minute.
- After that, grab your cuticle pusher and push them back.
TIP: If you don’t have honey, you can create a paste by mixing baking soda, water, and some cuticle oil to hydrate your nails.
Why Use Cuticle Removers?

Using a cuticle remover is one of the essential nail care steps that nail technicians do before applying any nail polish, gels, acrylics, or tips.
A cuticle remover is a solvent used to remove excess buildup of dead skin tissues on your nail, making it softer and easier to manipulate.
This professional nail product contains low pH level acids, which help dissolve and chemically exfoliate the dead cuticle tissues at the nail base.
Moreover, cuticle removers help prep your nails for beautiful manicure results while keeping your nails neat.
Keep in mind that the cuticle area is delicate and can get dry and crack easily.
Now, try to observe your cuticles. Are they peeling, cracked, or flaking?
If yes, then you probably have dry cuticles. When your cuticles are dry and start peeling and cracking, bacteria may easily enter your nails and eventually cause infection.
Luckily, you can treat your dry cuticles by applying a cuticle remover and adding nourishment using cuticle oil.
You can either use a chemical cuticle remover or a DIY cuticle remover to easily push back your cuticles. But be careful not to apply it longer than needed and make sure to easily apply it properly to avoid damaging your nail matrix barrier.
Pros
- Preps your nails for a good-looking manicure
- Helps prevent nail infections
- Softens and removes dead skin cells
- Provides you with the illusion of having longer nails
- Makes nail polish appear brighter
Cons
- The desired result may take time when applying to a rough cuticle
- Can damage nail tissues if overused or left on for longer than instructed
- Some products can be harsh on your nails and can weaken your nails over time
How Should You Remove Cuticles?
Experts present various takes on physically removing and cutting cuticles. Some may favor trimming cuticles, while most prefer to leave the cuticles alone.
According to the American Academy of Dermatology, it is crucial to avoid cutting the cuticles since it is a layer of the skin that protects the nail matrix.
Even though trimming them gives a neater look to your manicures, it can cause nail health issues down the line.
Once you trim your cuticle, you’re only making it more prone to infection as your nail root is open. When this happens, bacteria and other organisms can easily pas s through, which causes infections.
As an alternative to cutting them, nail experts recommend gently pushing back your cuticles using a wooden orange stick to avoid causing trauma to the skin around your nails.
Before you do that, soften your nails by soaking them in warm water, and then use a cuticle remover to remove the excess buildup of dead skin on your cuticles to make the process smoother and safer.
At the end of the day, it’s still up to you. But if you prefer the look of trimmed cuticles, ask your nail technician to soften your cuticles first and apply a moisturizing agent.
Then let them push back the cuticles first and trim the extra hangnails and skin. As much as possible, avoid cutting your entire cuticle off to prevent the potential risks that come with it.

Frequently Asked Questions
What are the safety precautions when making DIY cuticle removers?
If you’re planning to use any of the ingredients listed in this article for your DIY cuticle remover, be careful when dealing with them and avoid contact with your eyes.
In case any mixture gets into your eyes, make sure to rinse them immediately with water.
Moreover, if you are nursing or pregnant, discuss with your doctors any concerns and questions before using any of the ingredients to know whether they are safe for pregnancy.
When should you use cuticle removers?
If your cuticles are thick and overgrown, you should use a cuticle remover. Professional nail technicians suggest using a cuticle remover with every manicure session.
If you live in cold areas, your cuticle areas may dry up, crack, and peel.
You’ll need to use a moisturizing cuticle remover when this happens to help soothe and smoothen the skin around your nails.
What is the difference between a cuticle remover vs. cuticle pusher?
Cuticle removers are liquid and solvent products used to make the cuticle more adaptable and allow for pain-free removal by dissolving the dead skin cells on your nails and cuticles.
Meanwhile, a cuticle pusher is a tool you need to push your cuticles back. This tool can be made of wood, plastic, or metal.
Conclusion
If you want to avoid using chemical cuticle removers, you can always switch to natural DIY methods to create your cuticle remover.
Still, when using chemical cuticle removers and natural ones, remember to use them properly to prioritize your health.
Once you regularly do this, cuticle removes can transform how your nails look and improve even the overall health of your nails.
Let us know which DIY cuticle remover you want to try, and comment them down below!

Do you want to read more nail care articles?
You may want to check these out:
- 50 Gorgeous Almond Fall Nails You Need To Try This Season
- How Long Do Dip Nails Last? Your Guide To Dip Powder Nails
- 7 Luxury Press-On Nails You Need To Try