
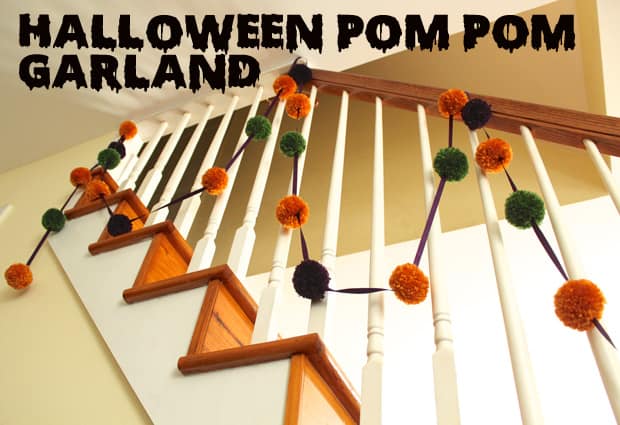
Halloween DIY: Pom-Pom Garland
This post may contain affiliate links, which means I may receive a small commission, at no cost to you, if you make a purchase.
We Heart Easy DIY Projects: Halloween Decor Edition
Who doesn’t love pom-poms? They scream out “FUN” and add the perfect amount of whimsy to your decor. When I spotted a bin of $1 yarns at the craft store, I was thrilled. I was shopping with a Halloween DIY in mind, and they happened to have purple, orange, and green yarns available on the cheap. Boo-ya. One Halloween home decor project coming up.
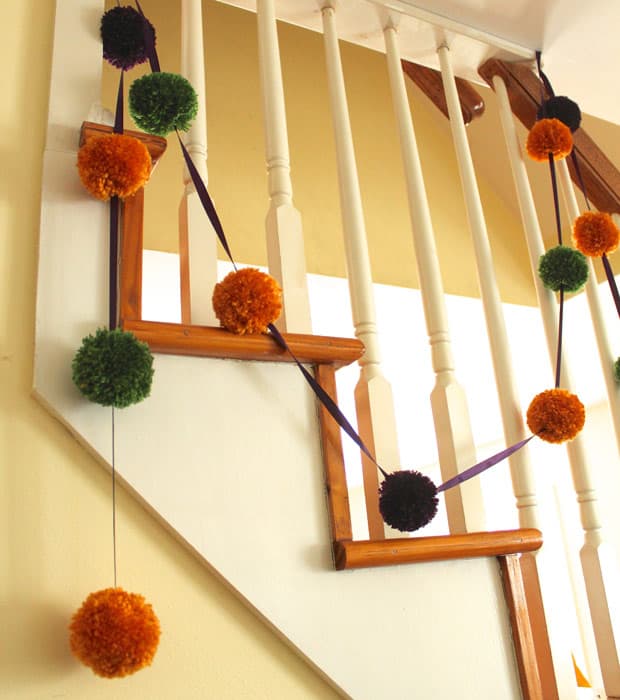
As you can see, I used these pom-poms to make a garland that now adds some color and Halloween fun to the staircase. Want a string or two of your own? Try this easy DIY project – with a few simple supplies, and a little bit of time, you’ll be creating your very own pom-pom garland!
Supplies:

•
- Yarn (I used 2 skeins of 3 different colors)
•
- Scissors
•
- Pom-Pom maker
•
- Tapestry needle
•
- Spool of ribbon (approx. 8 yards)
Tip: There are several different ways to make pom-poms, but I found that the Clover Pom Pom Maker to be the easiest and the fastest method – and not hard on the budget either. Pom-pom makers come in a variety of sizes. Keep in mind, the bigger the pom-pom, the more yarn you will use. For best results use chunky yarn, which winds quickly and creates super fluffy pom-poms!
Directions:

1. Get started by winding yarn around one open half of your pom-pom maker.
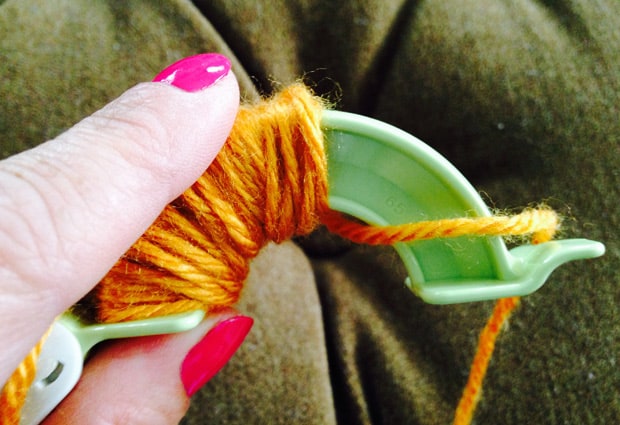
2. Keep winding until you get to the end, cut yarn.

3. Close that side of the pom-pom maker, open the second side and continue wrapping your yarn around it.
4. When you reach the end, cut yarn and close the maker.

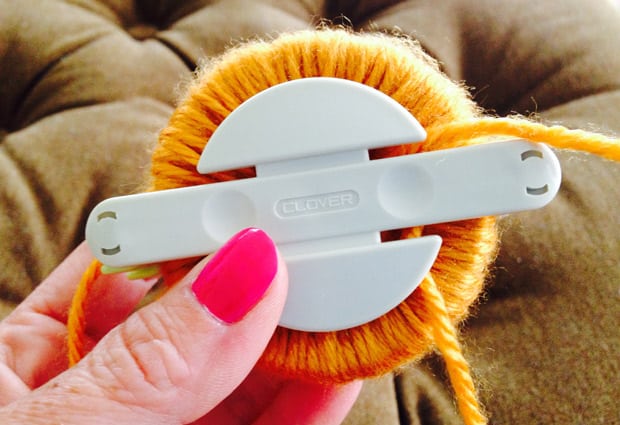
5. Carefully cut the yarn down the center of each arch.
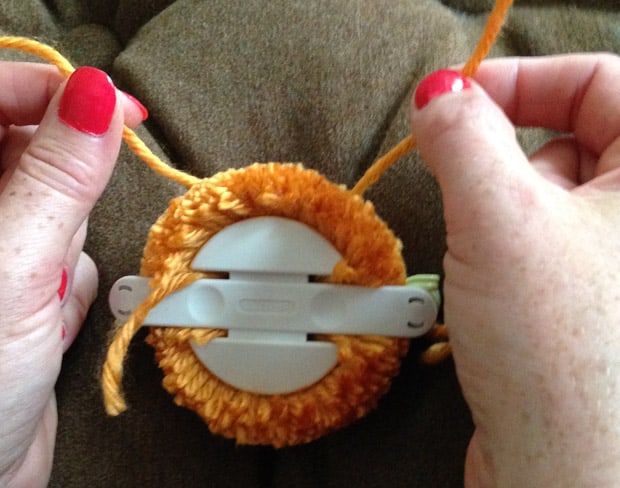
6. Next tie a short length of the same colored yarn (approximately 6 inches) tightly and in a double-knot around the pom-pom maker. This step secures all of your strands of yarn and transforms them into a pom-pom.

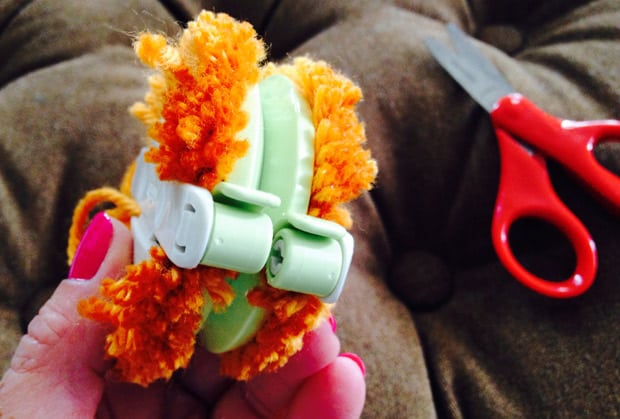
7. Open both arches and pull the 2 halves of your pom-pom maker apart. Remove your pom-pom and trim any longer strands of yarn.
Continue making pom-poms until you run out of yarn. This is fun and easy activity, for me at least!
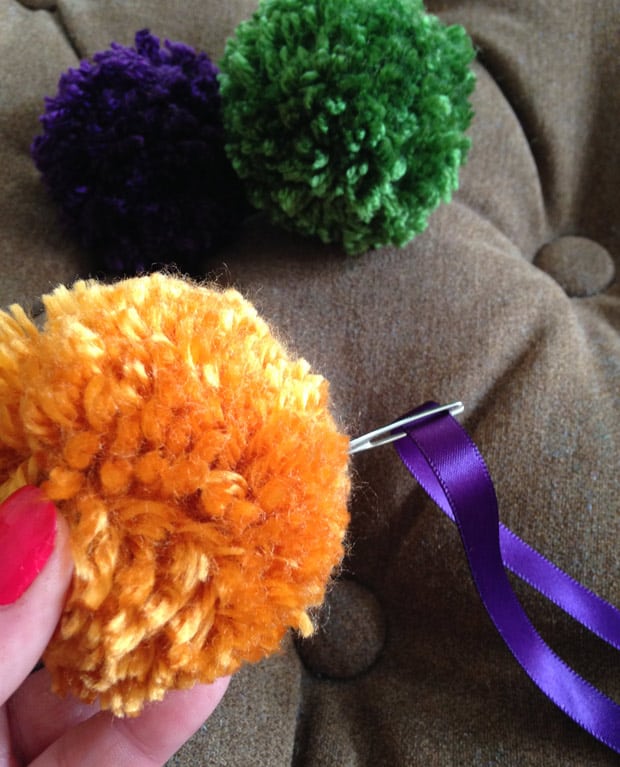
8. Now to tie the poms together. Remove ribbon from the spool (I used 3/8 inch wide ribbon). Tie a knot in one end.
9. Take the other end and thread it through the tapestry needle. Begin threading needle with ribbon on it, through the center of each pom-pom.
The spacing between each one of my pom-poms is approximately 6 inches. For this garland, I had a surplus of orange yarn, so I used an orange-purple-orange-green pattern.
10. When you are finished threading all of your pom-poms onto your ribbon, tie a knot, and cut away any remaining ribbon.

Now just hang your garland (on a staircase, fireplace mantle, balcony – anywhere), step back and enjoy!
we heartsters – Are your Halloween decorations DIY, store-purchased or a combination of both?
All photos: Rachel for we heart this
Rachel is a stay-at-home Mom that never seems to be home. She’s a military wife, mother to The Danger Boys and a self-proclaimed craftaholic that enjoys photography, knitting, baking and all things handmade.
This is too cute! and super easy too. I love that all you have to do is switch up the colors to make this a quick fix for festive decorations any time of the year!
I agree! I already made a second Pom-Pom Garland in Fall colors to keep up all Fall!
Super cute Rachel! I never cease to be amazed by your creative brain! Love how easy this is, how it adds such a nice punch of color AND how affordable it is too! And @mandabear is right – you could change out the colors and make more to celebrate any holiday (Valentine’s Day, Christmas, 4th of July, etc) or pick your kids favorite colors for a birthday celebration – or their team colors for an end of season celebration.
This is such a clever idea! I’m sure my pom poms would not be as perfect-looking as yours, but I’m seriously tempted to order that pom pom-making gadget and give it a whirl!
I love making the pom-poms while I am watching tv. I’m sure your pom-poms would be great!
I mostly decorate with mini pumpkins, decorative squash and Indian corn for fall. All of this can be found at any grocery store.
Back in my day, I had to make pompoms the old fashioned way! ;) That’s a nifty device. I just moved into my own place in June so I don’t really have tons of holiday decor yet. I do have a real pumpkin though!
This Pom-Pom maker is the ticket! I have made pom-poms using flat circles, and that was a pain!
This is too adorable–such a great idea. I wish I was more of a DIY’er, but I tend to buy more crafts because I’m lazy. A recent Halloween acquisition was a motion-activated raven that moves its wings and caws; it’s in a black cage with tattered lace hanging from the top.
Am I crazy, or does pom pom making look kind of relaxing?! This is super cute, I think a new obsession has just been born!
I’m with you Stef, it seems kind of relaxing! Really cute idea Rachel. I love Halloween, so the more decor, the better!
Stef, for me it IS relaxing. I usually bust a few out when I am watching tv or bored. I just finished a second garland using smaller pom-poms that are all touching in Fall colors. I may need to get started on a Christmasy garland to wrap around our tree!
Great DIY!!!!! I will use this one for all kinds of holidays. I am
so excited to give this a try.