
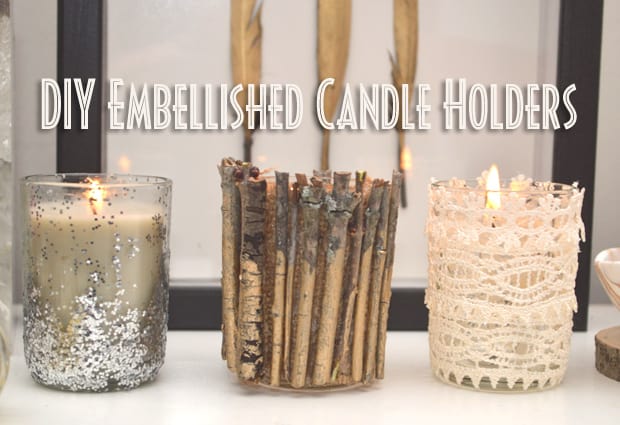
DIY Embellished Candle Holders
This post may contain affiliate links, which means I may receive a small commission, at no cost to you, if you make a purchase.
DIY Hostess Gifts are the Mostest Appreciated!
Editors Note: It IS the most wonderful time of the year! We heart this is thrilled to welcome back the DIY queen, Kirsten Nunez! we heartsters of the site will remember Kirsten’s amazing and fashionable how to’s on the site. She took some time away while she was hard at work on her amazing BOOK – Studs & Pearls: 30 Creative Projects for Customized Fashion – and we are so happy to have her back for a monthly DIY! ~ Stef and Tyna
This holiday season, try your hand at crafting up some DIY Embellished Candle Holders for your friends and family. Not only are they inexpensive to make, but you can personalize them to fit the taste and style of the receiver. And they’ll make a fabulous DIY hostess gift!
This trio of candle holders requires basic DIY skills, so don’t worry if you’re just a beginner. Gift them as a set or create multiples of one to customize a thoughtful present. Or you can just make a set for yourself – we won’t tell. Let’s get crafting!

You’ll need 3 glass candle holders and the supplies for each holder will depend on the type you are crafting.
Glitter Gradient Candle Holder DIY
Sparkle and shine with a fading layer of glitter. Chunky, hexagonal glitter works best for this one.
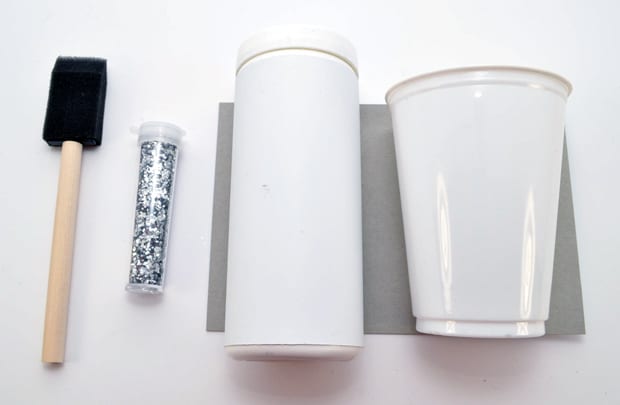
Supplies:
• Foam Brush
• Glitter
• Decoupage Glue
• Plastic Cup
• Scrap Cardboard or Paper (to protect your surface)
Directions:
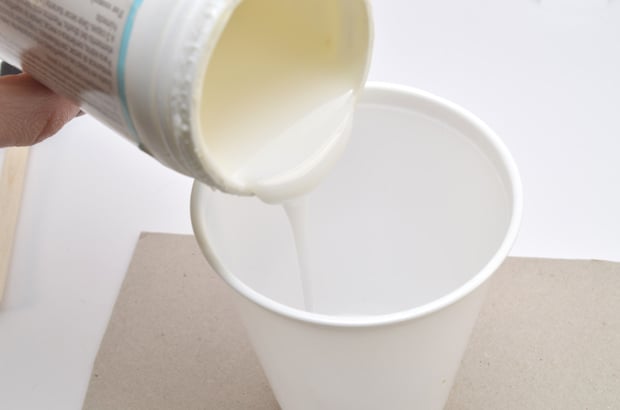
1. Pour about a tablespoon (or so) of decoupage glue into the cup.
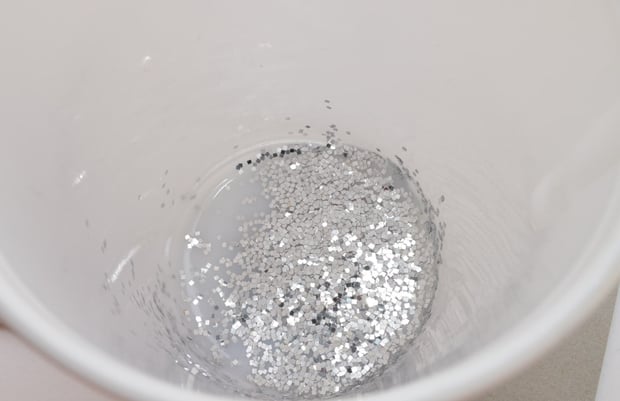
2. Add glitter! Lots of it. A little over a tablespoon should do.

3. Mix well with the foam brush.
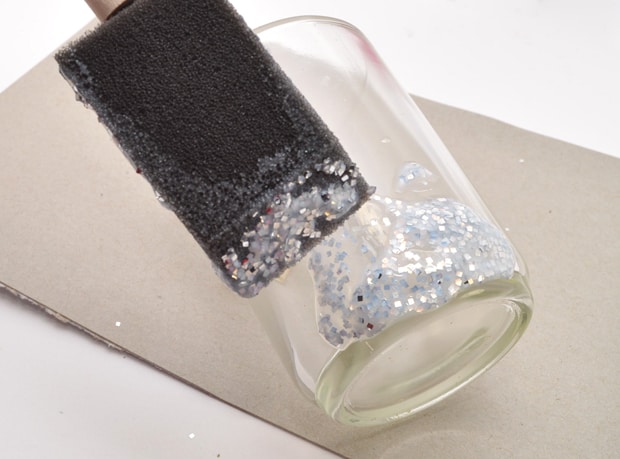
4. Add a healthy amount of the glitter mixture along the bottom of the candle holder.

5. Use the foam brush to drag the glitter mixture upwards. A majority of the glitter should stay along the bottom, thinning towards the top.
6. Repeat around the entire candle holder.

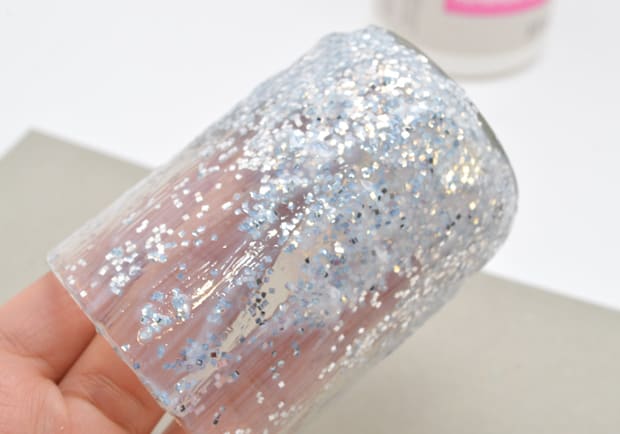
7. Let dry overnight.

8. Decoupage dries clear, letting the glitter gradient sparkle on its own.
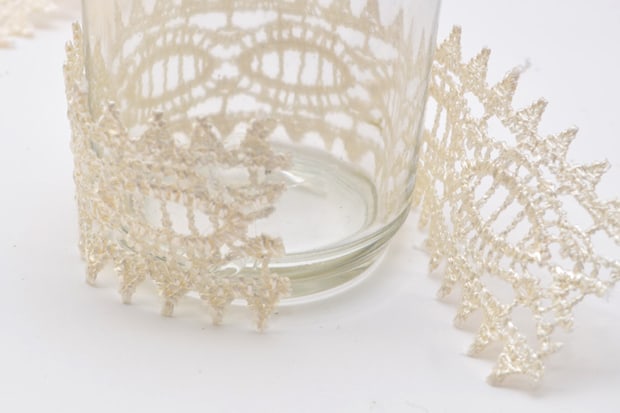
Lace Trim Candle Holder DIY
You can never go wrong with lace, especially for the ultimate girly girl in your life! The light of a candle will peek through the feminine lace, creating an interesting visual.
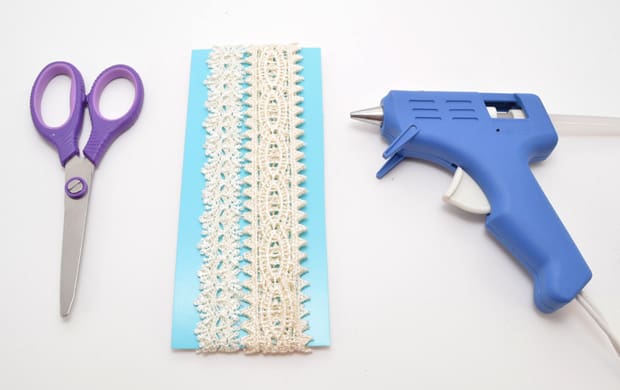
Supplies:
• Scissors
• Hot GLue Gun
• Lace Trim
Lace Trim Note: Depending on the width of your trim, you may add less or more “rows” than I did. The wider the trim, the less you’ll need; the thinner the trim, the more you’ll need.
Directions:

1. Add a small amount of hot glue to the bottom of the candle holder.
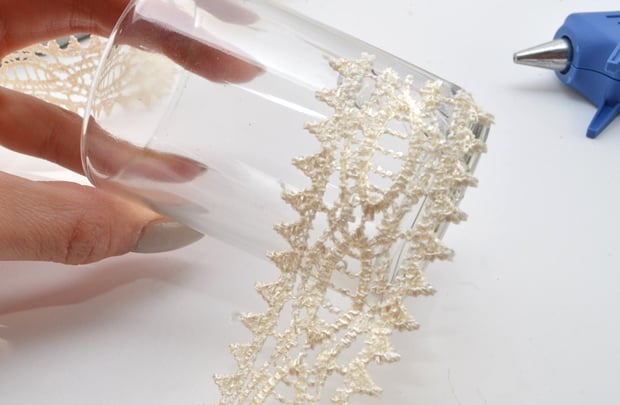
2. Attach a strand of lace trim.
3. Wrap around the candle holder, adding some hot glue to secure. Cut the trim right where it meets the beginning.
4. Hot glue the end.
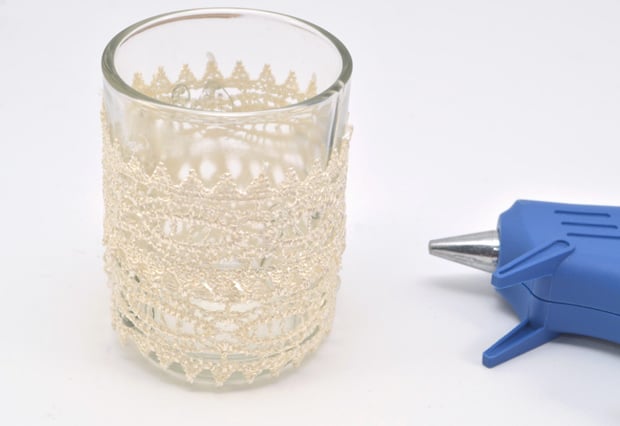
5. Repeat with the next row of lace trim.
6. If applicable, repeat with the next row(s) of lace trim. There was only a bit of space leftover on my candle holder, so I used the thinner lace trim for my last row.
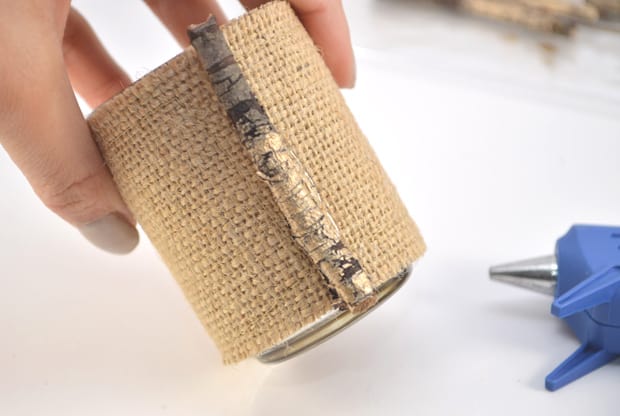
Metallic Dipped Twig Candle Holder DIY
For a natural element, simply grab some twigs from your backyard. The metallic detail is actually nail polish – a great excuse to finally use up that old bottle.
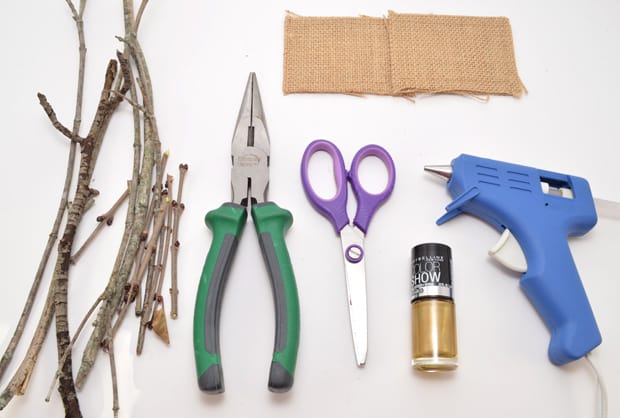
Supplies:
• Twigs
• Fabric (I used burlap scraps)
• Heavy Duty Pliers
• Scissors
• Old Metallic Nail Polish
• Hot Glue Gun
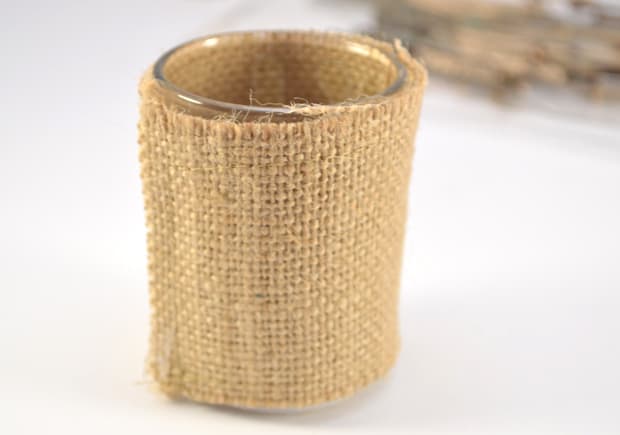
1. If needed, trim your fabric to fit the height of the candle holder. Hot glue the fabric to the holder.

2. Using the cutting portion of the pliers, cut the twigs to fit the candle holder.

3. On a protective surface such as scrap plastic or paper, paint the bottom half of each twig with nail polish.

4. Continue until all of the twigs are painted.
5. Hot glue twig directly onto the fabric.
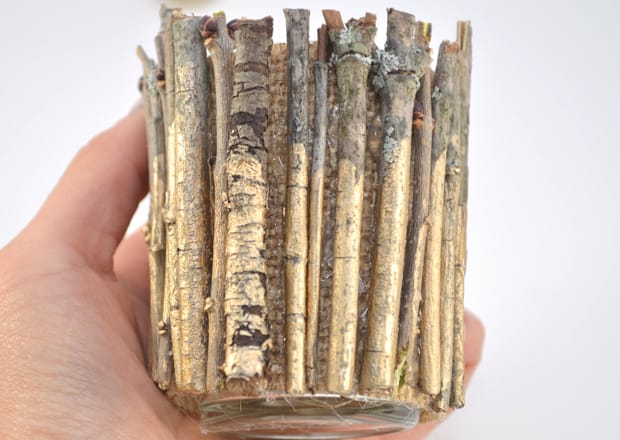
6. Repeat until the entire candle holder is covered. Let dry.

Once all pieces are completely dry, drop a candle into the holders, light them up, and step back and admire your work!
we heartsters – Are you DIYing any gifts this holiday season?
photos: Kirsten for we heart this
Welcome back wonder woman @kirsten-nunez! I’m sold on the adorable TWIG candle holder! I love that one! These are all great ideas and look super easy to do! Great for gift giving on a budget! I think I’m going to try this, my back yard has all the twigs I’ll need! :)
Thank you Irene!! The twig version is my favorite, too. Great way to use readily available materials, too ;)
These are all darling candle holders! Love the simplicity! So pretty!
Thanks lady!
I’m going to have to do the burlap/twig votives for next year (there’s too much snow on the ground to find twigs right now). They’ll fit in perfectly with the rustic vibe my house is rocking. Thanks for the post, @kirsten-nunez!
Glad the idea fits your house’s theme! Enjoy xx
Welcome back @kirsten-nunez – we are so happy to have you sharing your DIY goodies again! I am loving these candle holders – especially the twig one. SUper cure, easy to do and a DIY you know you will use. Can’t ask for more than that!
Thank you @tyna, glad to be back! xoxo
These candle holders are adorable. My granddaughters are coming over this weekend and I’ve been trying to think of a fun project we could do together. Making these candle holders would be perfect.