
DIY Jewelry: Bandanna Bolo Necklace
This post may contain affiliate links, which means I may receive a small commission, at no cost to you, if you make a purchase.

DIY Jewelry is so versatile; that’s exactly why I love it. And since jewelry projects are typically small, it’s easy to experiment with different textures and supplies. It gets even better when you bring in things that aren’t traditionally used for jewelry. This tutorial is the perfect example.
To make this handmade accessory, I transformed an old bandanna into a faux bolo necklace. Zero fancy jewelry components were needed. My secret? A pipe coupling from the hardware store. Thanks to the combination of fabric and metal, the finished product is an edgy (yet charming) piece. Here’s how to make it yourself!

Supplies
- Bandanna
- Extender chain
- 10 or 12mm jump rings (4)
- Cord end caps (2)
- Jewelry clasp
- 3/8-inch brass or copper pipe cap or flush bushing*

Related: What Is Permanent Jewelry? The New Welded Bracelet Trend
*You can find these components in the pipe section of your hardware store. Home Depot and Lowe’s are both great sources. Don’t be afraid to sift around; there are many kinds of parts that can work for this. Any metal cap-type component with a hole will do the trick. Check out the close ups of the piece I used, above!
If employees ask if you need help, feel free to politely decline. Something tells me they won’t understand why you’re making a necklace out of plumbing parts…

1. Diagonally fold the bandanna in half. Two opposite corners should meet.

2. Fold in half again. In other words, take one corner and bring it to the opposite corner. You should have a small triangle that looks something like this.

3. On the side with the crease (AKA the mid-point that you folded in Step 2), cut a diagonal slit measuring about 2 inches. This slit should start 2 inches from the corner; I cut right alongside the print of the bandanna. These measurements don’t have to be exact! Refer to the photo for a representation.
Next, cut across the bandanna. The yellow dotted line represents this cut. If you’d like a thinner necklace, cut right below the yellow dotted line.
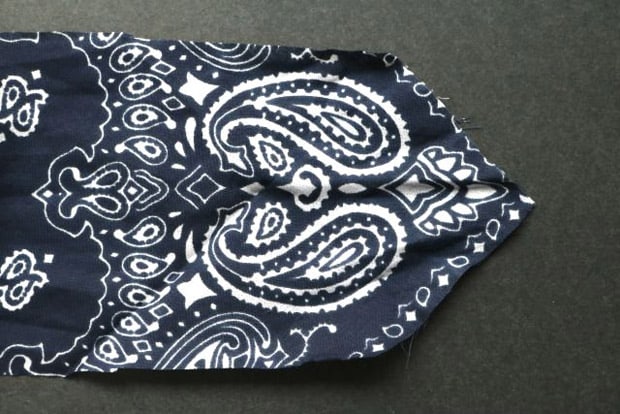
4. When you unfold the fabric, you’ll have a long segment that looks something like this. Both ends should have a pointed edge, as shown above.

5. Scrunch up the ends and insert them through the hardware. You may have to use the pliers (and a little elbow grease) to pull the fabric through.

6. Lay out the fabric in a circle shape.
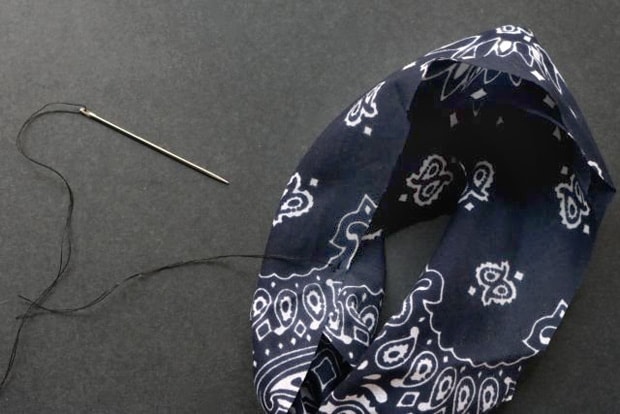
7. Add a few simple “X” stitches to prevent the fabric from unfolding.

8. Repeat on the other side.

9. Cut the fabric “circle” halfway. This will “open” it up and allow you to put the necklace on. Glue an end cap to each side. You’ll have to scrunch up the ends of the fabric before inserting them into the caps.

10. Using the jewelry pliers, open up the jump ring by bending the ends away from each other.

11. Attach the jump ring to one of the end caps. Add the extender chain and close the jump ring.

12. Add a jump ring and a jewelry clasp to the other side.

Your new necklace is ready to rock n’ roll. It’s excellent for sprucing up a plain t-shirt or dress when you need that extra oomph.

we heartsters, what color bandanna would you use for your necklace? Let us know in the comments, below!
Adorable! I am always looking for fun little projects to do.. this is a great and easy one! Thanks @kirsten-nunez. I love your posts! Too cute!
Thanks Irene! Glad you like it xx
This really is such an adorable project, and you make it look so easy, @kirsten-nunez! In fact, the hardest part will be going to the store to buy the hardware. Thanks!
Once you’re there, it’s actually pretty fun! And also super hilarious when someone asks if you need help, but you know they won’t understand what the heck you’re making, hahahah.